Monday, December 30, 2013

My New Computer!!!

The PMDG NGX at KJAC
 
At 6451ft in altitude, the small puffs of clouds moving across the runway at Jackson Hole Airport were expected.   In the distance, the Grand Teton Mountains glowed in the early morning Sun.  The virtual passengers, happy with their winter escape to snowy Wyoming, were ready to get back home to sunny California.   We lined the  Boeing 737-800 on the runway, having just received clearance.    Reaching down on the throttle, N1 TOGA was set, the engines revved up, and the PMDG 737 lurched forward.   Our jet barreled down the runway to the tune of a steady 27-33 fps.  Once V2 was reached, I rotated, climbed, and raised the landing gear.
Like a phoenix the 737 ascended leaving the highly detailed ORBX Jackson Hole airport behind.  Climbing over the mountains we were soon hit by the expected turbulence.  Finally a higher elevation was achieved as turbulence from the mountains dissipated.   The view from the cockpit was amazing.   Active Sky Next had completely recreated the current weather conditions, utilizing the high definition REX clouds to good effect.  The view of the mountains below was spectacular as this was the next best thing to actually being there.  It was hard to hold back a tear of happiness as I hit the ESC button.  But it was time to end this test flight as a dream had finally been realized!

   Milviz Bell 407 flying to ST Maarten

That dream was to finally conquer the unconquerable FSX and enjoy planes like the PMDG NGX on my own terms.   My older HP labtop could only run at 2.2 ghz and there no special video card installed.  Forget about adding faster RAM or the likes.  I was lucky to be able to get a touch of flight simulation with my older machine.  Addon scenery ran like a slide show, and the NGX could only run at the lowest settings.  Thanks to the Majestic Q400, the A2A C172, lower REX settings, and Matt Davies FSX 2013 tweaking guide.  They gave me a reason to go  on!  But the NGX, Real Air Lancair, and many scenery addons were shelved or never purchased.
 
Milviz Bell 407 lands at KJAC 
 
Then a glimmer of hope as the decision was finally made purchase a new system.  Somehow I became aware of  CyberpowerPC.  Their menu driven system allowed me to modify one of their base models for the requirements of FSX.   Namely, an overclocked Pentium I7, with a cpu cooler.  This was coupled with a EVGA GTX 780 graphics card and 8 gb of Corsair 2133 mhz RAM.   
Realair Lancair Legacy in the Caribbean islands

Changes to the price of the computer were clearly marked before ordering.  CyberpowerPC also included the option to overclock the computer.  I went for the 20% Extreme Overclock for an additional $50.  According to the CyberpowerPC website, should the CPU fail after being overclocked by CyberpowerPC, I would be guaranteed.  The CyberPC forum was also helpful as members answered some of my questions.
 
Majestic Q400 at Flytampa's KBUF


Overclocking!
As many FSX fans know, overclocking a CPU is used to get the best out of the Microsoft's Flight Simulator X.  While the base 3.5 ghz of the I7 was pretty good, I decided to go for the CyberpowerPC's 20% Extreme Overclock option.   Personally, I would rather have people familiar with overclocking do the dirty work for me and guarantee the result.   So far I have been very pleased with the result!   My computer has been very stable and has never displayed any odd behavior.
 
ANT's T28D Trojan, A steal at $17 USD

It must be stated that I do not currently know the exact clock speed of the new computer!   CyperpowerPC states a 20% increase in clock speed or more with the Extreme Overclock option.
So at this time I would label it an unconfirmed 4.2 ghz machine.   I am not sure exactly how to determine the CPU speed from the bios.   There is free software that will stress the CPU and test the actual speed of the processor.   But virus protection warnings from Norton's Antivirus software made me abandon these plans when trying to download these free programs.   So at this time, I will label my computer as an unconfirmed 4.2 ghz machine.
 

The large gaming computer arrives!


 After a few weeks of planning, the new system was ordered.   Pricing the components for the new system, my conclusion was that there was very little to gain by buying the components myself.  CyberPC took a sold 2 weeks before shipping the computer.   The system arrived nicely packed with all relevant material.  
 
 
Below is  a list of the main component for the computer based on the Gamer EXTREME 5200 build.  I have written a quick description as to why each component  was selected.  Of course we could debate for hours on each piece but i made my decision at the time the best i could with information forums on Avsim an Cyperpc:
 
Operating System:  Windows 7 was chosen given the fact that FSX and Windows 8 do not cooperate.  FSX was installed directly on the C drive.
CPU: i7 4770k     Built to be overclocked and the i7 version has added benefit for video editing over i5.   As mentioned before this i7 is expected to be overclocked at 4.2 ghz, but this has not been confirmed.
CPU Cooler: H110i    Suggested by a person on CyperPC forum.  The reviews for   the H110i suggested it was reliable and would keep the i7 cool.
Motherboard:  GIGABYTE Z87-n3H     A Z87 motherboard built for overclocking that was suggested to me by someone on the CyperPC forum
RAM: 8g 2133mhz Corsair      Corsair appears to be a respected supplier of components.  Most information suggested that FSX only requires 8gb.
GPU:   EVGA GTX780     At first I did not expect to spend so much on GTX780 and was hoping to get the 760 or 770 instead.  The EVGA GTX 780 can be overclocked giving near Titan performance.  While it may be overkill atleast I am prepared for future use with the card.
Case:  Borelight CF    The Borelight gaming computer case is quite amazing with its fans and easy access see thru panels.  But the case is Huge!
 
View of nice HD REX clouds as the Lancair flys thorough ORBX CRM
 
Setup:
Matt Davies 2013 FSX Tweaking Guide  is simply the best guide I have seen for setting up FSX.   The guide contains all of the latest information on tweaking FSX. 
His advise is solid, and I have no problems following his suggestions.  The 20 minute video goes thru everthing from FSX settings, Bojote's online config tool, changes to FSX cfg, and Nvidia inspector settings. 
 
 
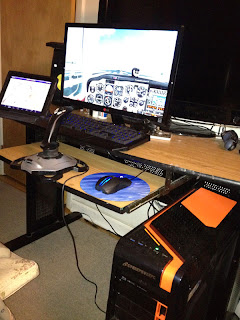
Picture of my 22" LG computer screen
 
Addon Heaven!
After obtaining my new computer, I went nuts adding numerous addons.   During Christmas and Thanksgiving, I took great advantage of many of the sales going on.  Biggest was the 50-30% sale on ORBX products.  Numerous FTX regions were purchased along with 3 ORBX airports.   I also purchased two Flightbeam Studio airports, four UK2000 airports, and 3 FlyTampa airports.
Active Sky Next was purchased and I an not imagine flying without it.  For addon planes, ANT's T28D Trojan was purchased along with the excellent Milviz B407 helicopter.
Finally, FTX Global was purchased giving me awesome textures for areas outside of the FTX regions.
 
EA's Battlefield 3

 
Other Uses
While the primary reason for purchasing the new overclocked system was the flight simulation, there were other uses.  The new computer has replaced the TV in my bedroom as I now watch Netflix on the new computer.   Both Battlefield 3 and 4 have been purchased and played on the new system. 
The experience is unreal as the new system gives amazing graphics. 
 
EA's Battlefield 4 
 
Amplitube 3 Custom Shop was downloaded.  The sound quality of playing guitar thorough Amplitube 3 is very high.   Playing my Les Paul thorough Amplitube 3 gives an amazing tone!


The Future!
 
In the coming future I hope to do more virtual airline flying and general aviation flying.
FSX looks so amazing now between the ENB, ASN, REX, ORBX scenery, that it is hard to focus!
I literally don't know what to do first!   I never became fully competent with the NGX and hope to train with 737 in the coming weeks.  At some point I will start to train with the Aerosoft Airbus too.
I have already purchased a headset and will purchase FS2crew for these two airliners.  
 
For GA flying, I hope to focus on tours of Africa, Australia, and possibly New Zealand.  
At some point I will also purchase VOX ATC so that I can move towards learning ATC dialog an prepare for flying online.  At some point in time, my setup will probably have to transfer to DX10 mode as all the scenery addons will eventually cause out of memory issues.  But for now, I literally can not believe how amazing flying in FSX has become with the new computer!!! 


Thursday, December 12, 2013

Backcountry flying through Idaho. S78 to ID35 to U70


There is a simple beauty to the backcountry of Idaho in winter.   A varied set of geographic features from the dry Columbian plateau region to large snow covered mountain ranges can be observed.   This is true backcounty.  Flying between mountains, through deep gorges, all the while looking for small tiny landing strips. There is no better an aircraft for such a venture than the venerable J3 Piper Cub fitted with tundra tires.  


Preflight Brief:
I decided to carry out this simple flight to get a view of the backcountry.   While the total flying time was not more then 1 hour, the VFR flight was broken up into two specific legs.  This consisted of flying northeast from Emmett Airport (S78), then north through the mountain range, and landing at High Valley (ID35) landing strip.  This was followed by leaving the next day from High Valley, and heading north to land at Cascade airport (U70).  The route only contained one short section of airspace upon departure.  

VFR Flight Plan
A detailed description of the flight plan is below:


My VFR Flight Plan (S78 to ID35 to U70) 

My VFR plan for the 1st leg consisted of the following:
  1. heading northeast after takeoff from Emmett Airport (S78) to Black Canyon Reservoir
  2. Head north at the end of the reservoir keeping the north-south mountain chain off my left wing.         Use the mountain range and electric wires for visual reference. 
  3. Upon spotting the ranch, head northeast through the pass between the mountains to High Valley (ID35) landing strip .

My VFR plan for the 2nd leg was the following:

4.  Take off from High Valley heading northeast looking for gap leading to the valley running north and south.  
5. Follow the valley north to Cascade Airport (U70), using Snow Bank mountain and the lake Cascade for visual guidance.


Leg1: The weather on the day of leg1 was very good.  I looked at the METAR data at Boise Idaho (KBOI) located near Emmett.  

KBOI  13003KT 10SM  FEW110.   Therefore, few clouds at 11000 feet with 10 mile visibility.  
EMMETT (S78) AFD

A look at the EMMETT AFD led to an interesting read.  The AFD mentioned watching out for golfers on the runway.  This is expected as the AFD also mentioned that the golf course was on both sides of the runway!
A small agricultural runway was also described.  After allowing the Cub to warm up, I taxied out to runway 28.
Not seeing any golfers, I gave the cub full throttle and took off.  A quick flyby of Emmett airport was conducted before heading northeast.  
                                                             EMMETT (S78) flyby

I flew the Piper up to about 5500 feet giving me about 2000 feet above the terrain below.   The town of Emmett was obvious and helped me to navigate visually to the reservoir.    It is important to note that at this time of year the Payette river runs a little dry.   From the air, the only water that was spotted was from the reservoir and from the beginning of the reservoir and the river.  Water was not spotted to the extent shown on the VFR sectional.

Black Canyon Reservoir

The large 5896 feet mountain peak at the end of the mountain chain off my left wing was an important visual reference.  For this stage of the flight I used it to help navigate north in search of the ranch and the break in the mountains off my right leading to High Valley.
 Large 5896 feet mountain peak at the end of the mountain chain off my left wing 


The small line of electric lines was also useful.  Before long the tiny break in the mountains on the right was spotted along with the ranch on the VFR chart.  I turned northeast and  headed to High Valley (ID35).

Tiny gap in mountains off my right wing leading to ID35


  Landing at High Valley was quite an experience.  High Valley is a privately owned landing strip.  But with the Orbx scenery, our impression of High Valley is that of a short dirt strip located in a small clearing.  SMALL CLEARING, with not a lot of room especially given the high snow covered trees surrounding the landing strip.   It is important to note that another landing strip located just west of High Valley was not shown on the VFR sectional chart.
Unidentified landing strip with High Valley (ID35) ahead.

Luckily, I had lowered my altitude to 1000 feet above field elevation before approach.   The track heading northeast helped line the Cub up for approach to runway 36 and no sharp maneuvers were required.  I was able to set the cub to 15000 rpm and enjoy a nice descent onto the short 2300 foot RW 36.  Just hugging the trees on final allowed me to stop before the end of the runway.  The small size of the dirt covered airstrip did not leave much room for error.   Luck was on my side as there was no crosswind upon final.  I still wonder how big of a plane could land on this size of a strip.


                                               Link to Skyvector information about High Valley ID35

I decided to stay the and shut the cub off for the night.  Unfortunately, the next day I was greeted with dreary weather.  Snow had passed through leaving dark higher clouds behind with a base of 11000 ft according to METAR data from KMYL.   The wind was quite acceptable at only 5 kts, and visibility was good.  I made the decision to head out.      


Lining up for takeoff from runway 36

I had some safety concerns before taking off from High Valley.   Given the runway was located at 4883 feet in elevation, the higher altitude would lower engine power upon takeoff.  Given the short field and the tall trees at the end of it, I was nervous!  The Cub was given ample time to warm up after starting the engine.  Then the Cub was pulled to the very end of  field before taking off from RW 36.  After a tense 30 seconds, the J3 was climbing over the trees as sweat was coming down my brow.   In some ways my concerns had been justified as the Cub did take require a lot more runway for takeoff than expected. 

Climb out from High Valley (ID35)

After the tense takeoff, I slowly climbed to about 5500 feet.  The gap in the mountains along with Highway 55 was soon discovered.
Gap and Highway 55

Snow Bank Mountain loomed visible to the north shone like a beacon and was visible the entire trip from High Valley to Cascade.  The mountain only became more impressive as I flew closer.   The peak of the mountain is labelled as 8360 feet!
           Snow Bank Mountain

Following north along the lower flatland took me straight towards the town of Cascade and the Cascade airport (U70).   On approach to the airport, I could see Snow Bank Mountain, Lake Cascade, and Highway 55.  
The AFD for U70 mentioned that aircraft were not to fly over the town located northwest of the airport.  

Approaching Cascade Airport (U70)

Surprisingly the elevation of Cascade Airport was not much lower than High Valley at 4742 feet.
Unfortunately I tried to make some sharp maneuvers on final and was treated to some very unpleasant reactions from the Cub.   This was most likely due to the higher altitude.   

Landing RW 30 at Cascade (U70)

To be honest, even though there were no crosswinds, I had a bear of a time landing at U70.   My sharp maneuvers and the Cubs reactions to them had been quite unsettling.   Landing onto runway 30 at U70 was not very smooth to say the least.   The landing on the short dirt runway at High Valley had gone much better!

Conclusion:
There are many different things that can be garnered from the use of FSX to simulate real world flying.
While we are not really flying a plane, we can learn about real world aviation.  We can learn about flying a complicated jet along an airway, or about flying a simple GA aircraft through the backcountry of Idaho.  To me this is the beauty of flight simulation and everything it has become!  


There were quite a few lessons that I garnered from this trip.  One of the most important lessons was to not under estimate the effects of altitude on the aircraft.   Flying an aircraft at a higher elevation is one thing, but landing and taking off at a higher elevation is another!  I also learned to be more careful with sharp maneuvers with the Cub at a higher elevation.  The use of the AFDs was also an eyeopener.   Good weather conditions were crucial for a flight like this to become a reality with the limited Cub.   A final lesson was to expect the unexpected, such as rivers drying up, and unexpected landing strips not showing on the VFR chart.   


Below is a video I found on Youtube of a C180 flying through the backcountry of Idaho.


Monday, December 2, 2013

VFR Niagara Falls (KBUF to CYSN)


Preflight Brief:
The purpose of  today’s flight, was to enjoy beautiful views of the beautiful Niagara Falls region.  
Niagara Falls is located 17 miles northwest of the city of Buffalo NY and 80 miles from Toronto Canada.  Niagara Falls is the largest waterfalls on the continent of North America.  The Falls constitute three specific waterfalls.  The Horseshoe Falls, the American Falls, and the smaller Bridal Veil Falls.  The two main waterfalls, the Horseshoe and American, are separated by Goat Island.  These waterfalls were created at the end of the last ice age.  This was due to the creation of the Great Lakes upon the recession of the glaciers.  Water has eroded through the Niagara escarpment as it flows from Lake Erie to Lake Ontario on its way to the ocean.

The flight was conducted in the A2A J3 Piper Cub from Buffalo International Airport (KBUF) to Saint Catharines (CYSN) using visual flying rules (VFR).  The Cub is perfect for such an adventure given its slow cruise speed of around 75 kts.   The Cub also affords great visibility out of it’s large windows.  The conditions today were perfect for a VFR flight given that there were no clouds below 10000 ft and 10SM visibility.   
This was a great relief from the previous weather that saw constant snow flurries and brisk winds.

VFR Flight Plan

Flight Plan:
Here is where it gets interesting.  The main objective of the flight was to obtain views of Niagara Falls coupled with views of the Niagara Gorge.  The Niagara Gorge and the Niagara River constitute the border between the US and Canada.   Unfortunately the airspace on the US side is quite crowded.  There is heavy airline traffic landing and departing from KBUF.   Northward there is traffic in and out of Niagara International Airport.   So in short, two specific airspaces to fly through.  My  solution was to jump the border upon departure and travel on the Canadian side!  As anyone from the North East will tell you, the view of  Niagara Falls is better from Canadian side anyway.

The VFR flight plan that I devised was to hold a steady 230 SW heading upon departure from KBUF and climb to 2500ft.  Upon reaching Lake Erie, I would keep the city of Buffalo on my right wing while flying a wide half circle around it (#1). The half circle would see me reaching land again on the Canadian side heading north.  Using Port Erie Airport (PVT) as a visual marker, I planned to quickly located Queen Elizabeth Way (a Canadian highway)(#2).   The highway would lead me to visual contact with the route 166 (#3).   Route 166 would then lead me directly to Niagara Falls (#4). 

Upon reaching the Falls, I would then fly in close for a few pictures travelling over the city of Niagara. 
Upon completion I would head north up the Niagara Gorge to the hydroelectric powerstations.  After passing the stations, (#5) I would turn NW to locate and land at Saint Catharines Airport (Class E airspace).

Preparing to take off from RW 23 at KBUF


KBUF Terminal


Departure and climb out:
Departing KBUF was a snap due to the less then favorable cross wind that gave me an interesting take off from runway 23.  But once in the air,  I was able to admire the view of the larger than life Buffalo International Airport.   Truly admire as the Cub required so little runway to take off that I was soon maybe 200-500 ft over the airport.  A heading of 230 soon brought me directly over Lake Erie with the city of Buffalo off my right wing.  By then I had reached 2500 ft and was making about 75 kts.

At 2500 ft over Lake Erie with Buffalo NY off my right wing

Cruise:
Using the entrance of the Niagara river and Buffalo city a visual reference, I few a large half circle. 
Coming back over land on the Canadian side near the mouth of the river, Fort Erie Airport (PVT) was quickly spotted.  

                 PVT and Queen Elizabeth Way

This small airport was perfect for locating Queen Elizabeth Way.   Soon I was orientated parallel with this highway and heading northwest.  

 Intersection of Queen Elizabeth Way and RT 116.  Mist from Niagara Falls in the distance.

Following Queen Elizabeth Way led me to highway 116.   I now turned North to follow 116 to the Falls.   By that time, mist from the Falls and the city of Niagara Falls could be seen in the distance. 

Approaching the area of  Niagara Falls called for caution due to the heavy tourist helicopter flights.  For around $150 you can get a nice 20 minute flight around the Falls in a local copter.  Luckily none of those pesky blade spinners were spotted.

 Entering the Niagara Falls area and slowing to 65 kts.


Niagara Falls:
Finally upon reaching the Falls, I slowed the cub down to 65 kts and trimmed again for level flight.  The view at 2500ft was perfect.  The Horseshoe Falls and American Falls were in full force as mist spewed in the air.  The tiny Bridal Veil Falls could be spotted past the American Falls.  Listening carefully I could hear the noise of water crashing down.  

The Horseshoe Falls, American Falls, the tiny Bridal Veil Falls, the Skylon Tower, and the Rainbow bridge.


On the Canadian side, the Skylon Tower was quite prominent.  The Rainbow bridge could be seen proudly bridging the Canadian and American borders.  Looking carefully, a balloon could be spotted on the American side.

Niagara Gorge:
After soaking up the view of Niagara Falls,  I headed north along the Niagara River and the Niagara Gorge.  The Gorge is quite deep.  Originally the falls began life at Lake Ontario.   Through thousands and thousands of years of erosion it has worked worked its way south to its present location leaving the deep Niagara Gorge behind. 


Leaving Niagara Falls behind.


The Robert Moses Niagara Hydroelectric Power Station:
Soon the Robert Moses Niagara Hydroelectric Power Station came into view on the American side. .   In the distance, Lake Ontario could be spotted.  A quick look to the left revealed Saint Catharines Airport (CYSN) off in the distance.

 
The Robert Moses Niagara Hydroelectric Power Station on the American side of the gorge.


Saint Catharines (CYSN)
Landing at Saint Catharines was quite interesting.   The Cub is an interesting airplane.  For such a small plane, you would expect it to be more maneuverable at times.  Unfortunately that is not always the case.   As you lower the airspeed, the flight controls of the Cub become less effective decreasing your ability to turn.   To make a long story short, I over ran Runway 23 and had to do a go around.  The controller advised me to land on Runway 11. 
 Approaching Saint Catherines Airport (CYZR)


This time I was more prepared and kept my airspeed up while on approach.  Coordinated turns are very important in the Cub and you have to look at the gyro to determine how much rudder to use.  After circling over the city of Saint Catharines, I was able to make a good approach in Runway 11.  The other interesting aspect of the Cub is that it is heavily affected by crosswinds.   Luckily I was able to correct for the slight breeze on my starboard side and landed without incident.   The Cub was then taxied to the GA parking and shut down for the day.  Total flight time was about 1 hour.

Landing on RW 11 and correcting for cross wind.


Restricted Area CYR518!
Ah, if I had only stayed above 3500 ft !!!  I later found out after landing, that  you need special permission to fly in the near vicinity of Niagara Falls below 3500 ft (I was at 2500ft).   This area is designated CYR518.  The following link gives a detailed map of the restricted area.  The good thing is that next time, I can use the map below to fly on the outskirts of the restricted area or simply obtain permission. 

                                                              Click here for Map of CYR518
Conclusion:
I truly enjoyed this VFR flight.  It is amazing that you can obtain so much enjoyment from flying around at 75 kts with no retracted landing gear, no GPS, and no autopilot  (who knew?).   The A2A J3 Cub is quite an amazing plane, but that has been well established.  The use of VFR sectionals was quite informative for looking at the different airspace regulations and planning a VFR route.

The two main scenery packs that were used for this flight were the Aerosoft Niagara X and the Flytampa KBUF.   Both quite spectacular and highly recommended!   I purchased the Niagara X for only 13$ and have to say, I really got my moneys worth.  The waterfalls are quite amazing with this package.  You can actually see water coming over the falls.  The detail in the buildings around the falls is extremely well done along with the city of Buffalo.   Many of the airports in the area are also improved with Niagara X and the Flytampa installation adjust for the Niagara X scenery.   Thankfully my new computer has allowed me to take advantage of such add-ons.  But more on the new computer later!